Security Fundamentals
Series Navigation: This is Part 14 of the 15-part System Design Series. Review Part 13: Distributed Systems first.
System Design Mastery
Your 15-step learning path • Currently on Step 14
Introduction to System Design
Fundamentals, why it matters, key conceptsScalability Fundamentals
Horizontal vs vertical scaling, stateless designLoad Balancing & Caching
Algorithms, Redis, CDN patternsDatabase Design & Sharding
SQL vs NoSQL, replication, partitioningMicroservices Architecture
Decomposition, discovery, testing, resilienceAPI Design & REST/GraphQL
RESTful principles, GraphQL, gRPCMessage Queues & Event-Driven
Kafka, outbox, event sourcing, idempotent consumersCAP Theorem & Consistency
Distributed trade-offs, eventual consistencyRate Limiting & Security
Throttling algorithms, DDoS protectionMonitoring & Observability
Logging, metrics, distributed tracingReal-World Case Studies
URL shortener, chat, feed, video streamingData Modeling & Schema Design
Data modeling, schema design, indexingDistributed Systems Deep Dive
Consensus, Paxos, Raft, coordination14
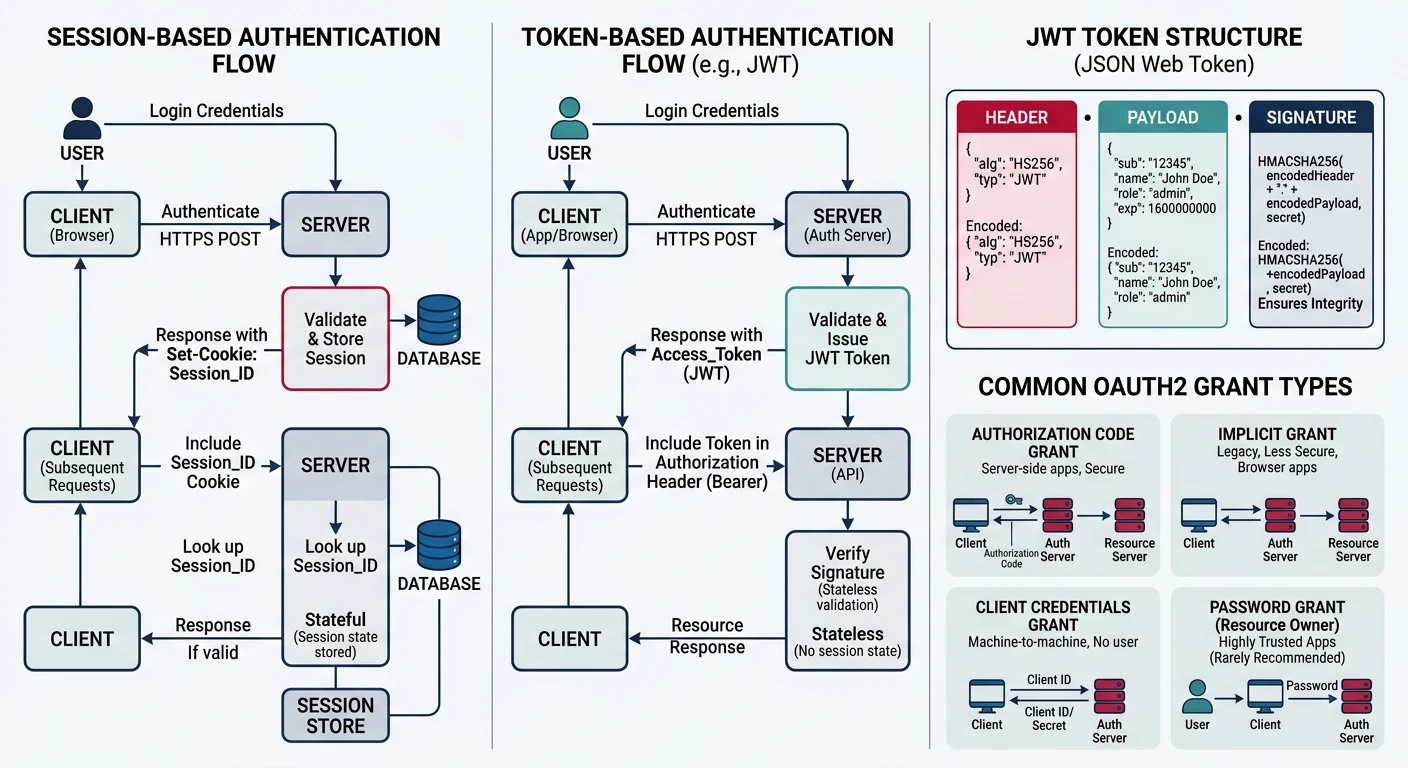
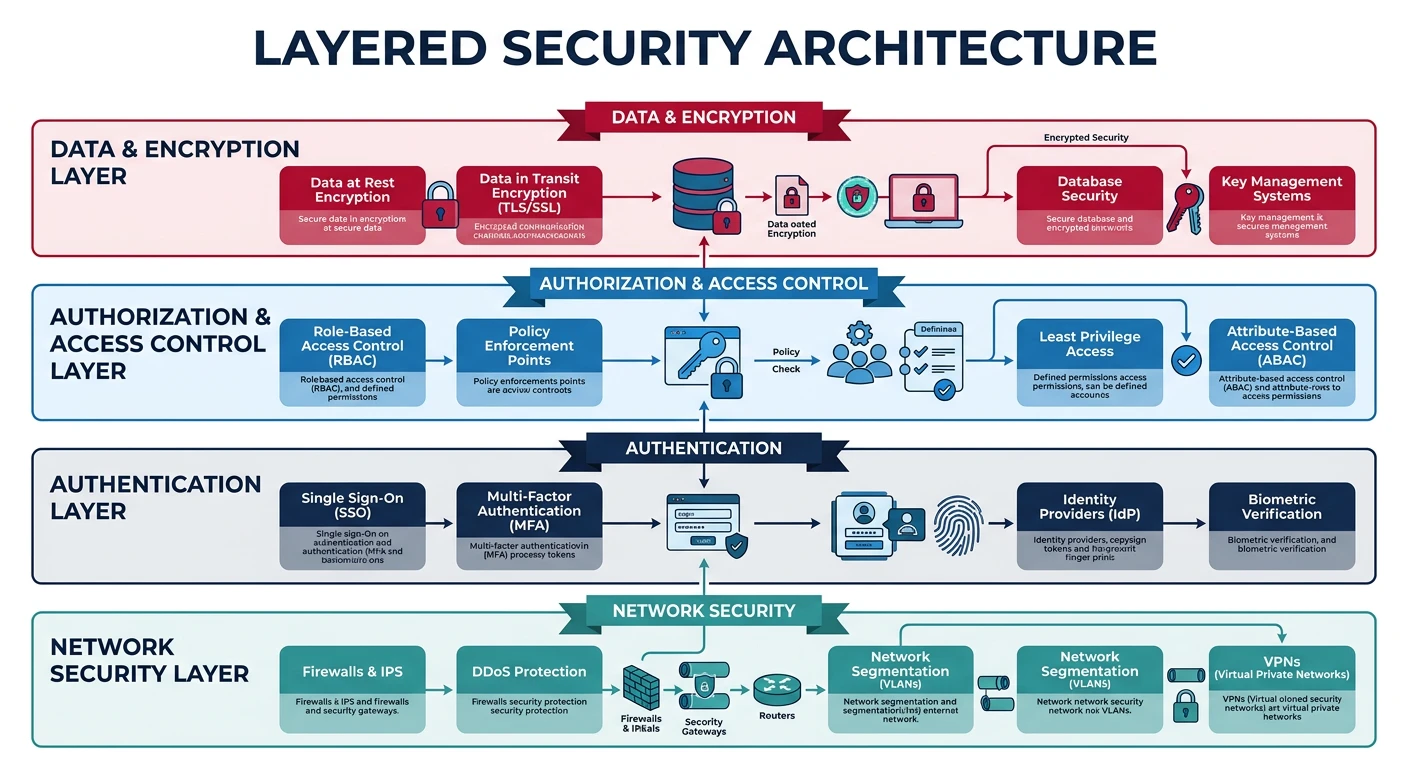
Authentication & Security
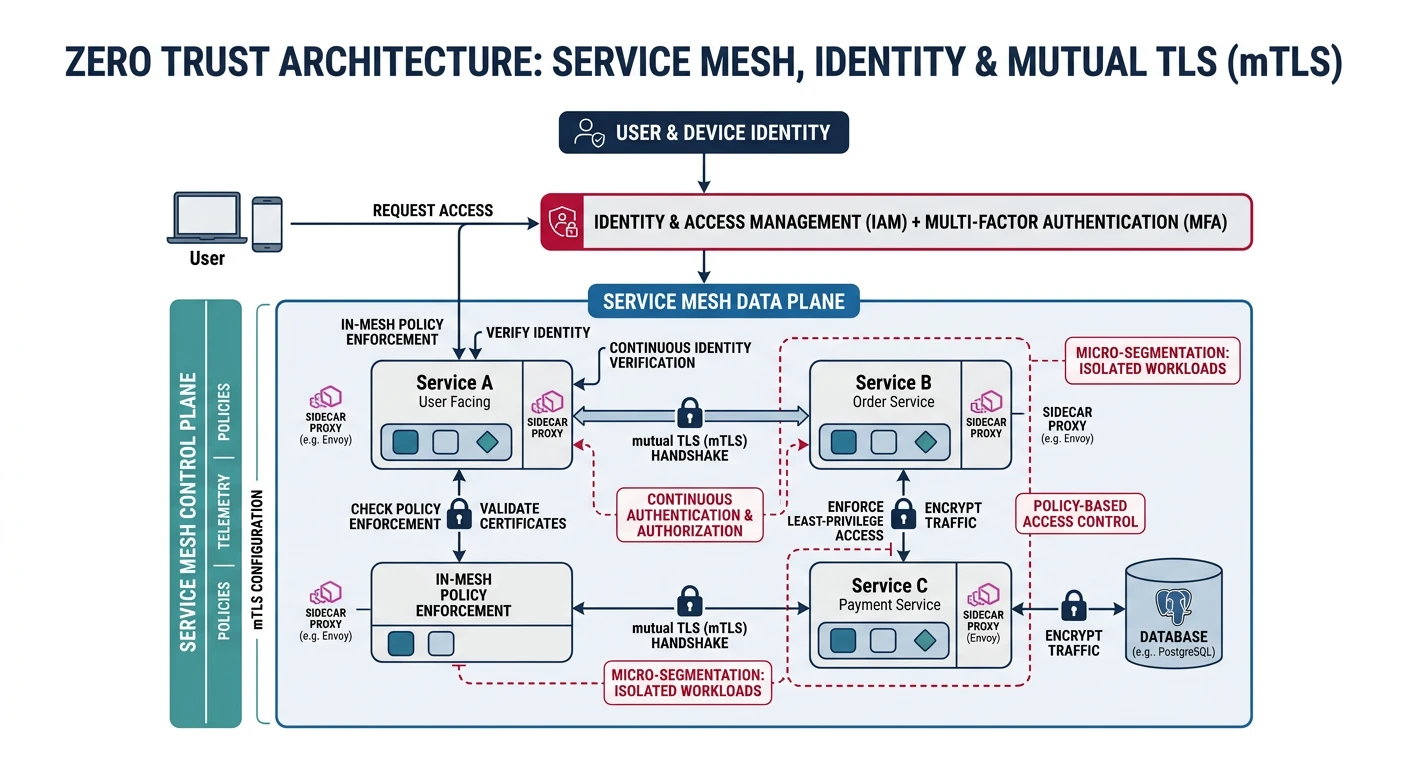
OAuth, JWT, zero trust, compliance15
Questions & Trade-offs
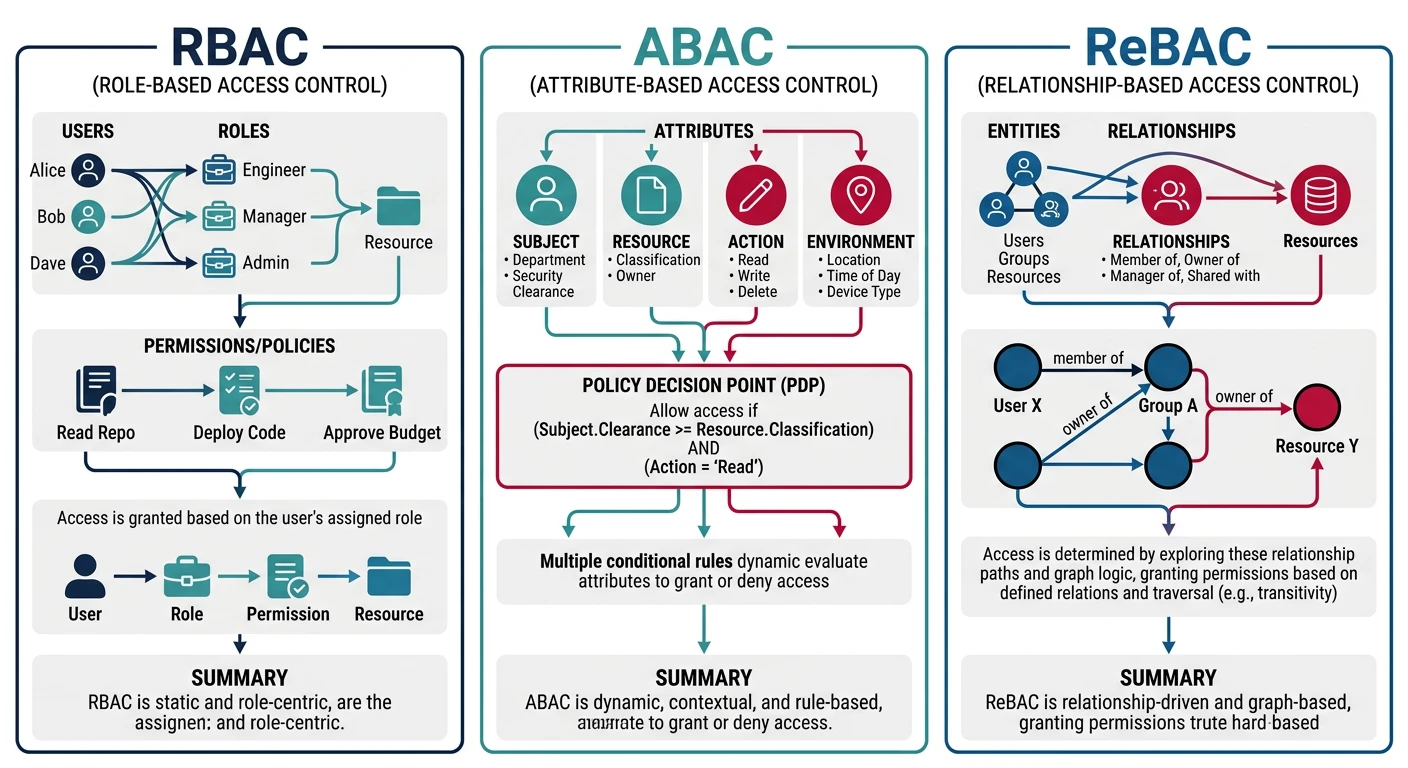
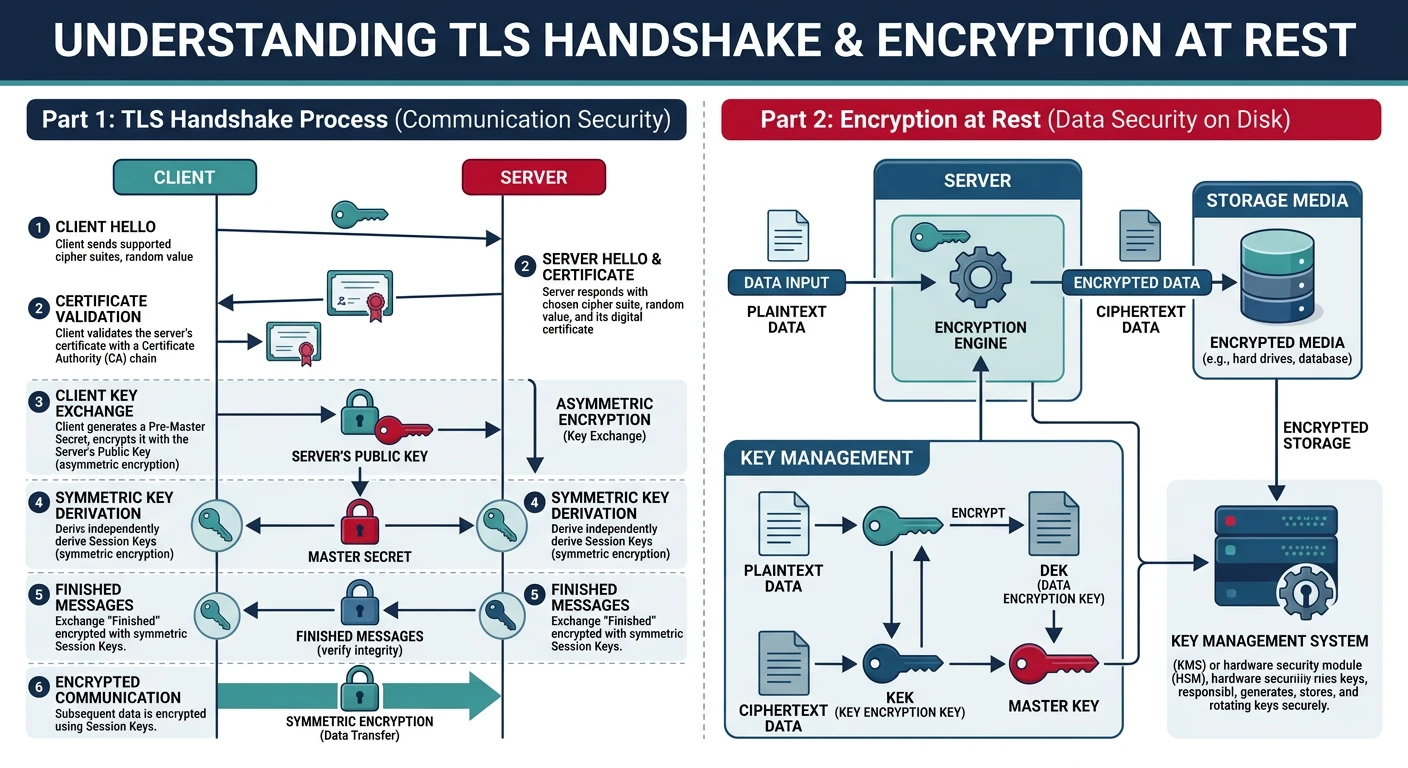
Common questions, SQL vs NoSQL, push vs pullSecurity is not an afterthought in system design—it must be built into every layer of your architecture. Understanding the difference between authentication (who you are) and authorization (what you can do) is fundamental to designing secure systems.
Key Insight: Security is about trade-offs. More security often means more friction for users. The goal is finding the right balance between protection and usability for your specific use case.